基本的Token配置
在之前的OAuth学习中,我们都是使用它默认生成的Token,那么我们这一节就是来自定义Token的一些配置。
配置Token
配置Token需要继承AuthorizationServerConfigurerAdapter类
1 |
|
由代码注释可见,继承此类,必须重写方法配置AuthorizationManager和UserDetailsService,其中UserDetailsService我们之前已经实现,直接注入即可,AuthorizationManager在SpringBoot2.x,Security5.x之后需要我们向容器注入,否则会出现无法找到类的情况,所以我们下一步需要向容器注入AuthorizationManager。
还有一点需要注意的是,在SpringBoot2.x,Security5.x之后,客户端密码即clientSecret需要进行加密,不然无法匹配。
向容器中注入AuthenticationManager
这里我们使用之前配置basic登录方式的AppSecurityConfig类
1 |
|
这样其实已经配置好了,但是还有有一点可以配置的,就是Token的保存位置。
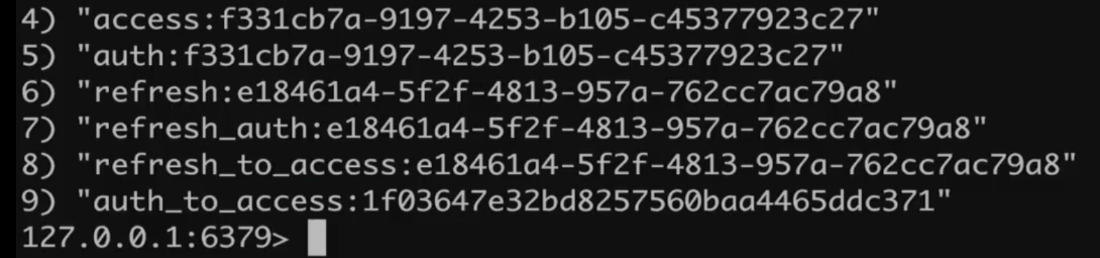
使用Redis存储Token
我们之前都是使用默认内存形式保存的Token,这样应用一重启就失效了,现在我们改成使用Redis保存,为何不用Mysql我就不赘述了。
使用方式也很简单,首先向容器注入RedisTokenStore存储器
1 |
|
然后再刚刚配置Token的地方配置TokenStore
1 |
|
这里Redis的配置可以自行在application.properties中配置
启动测试
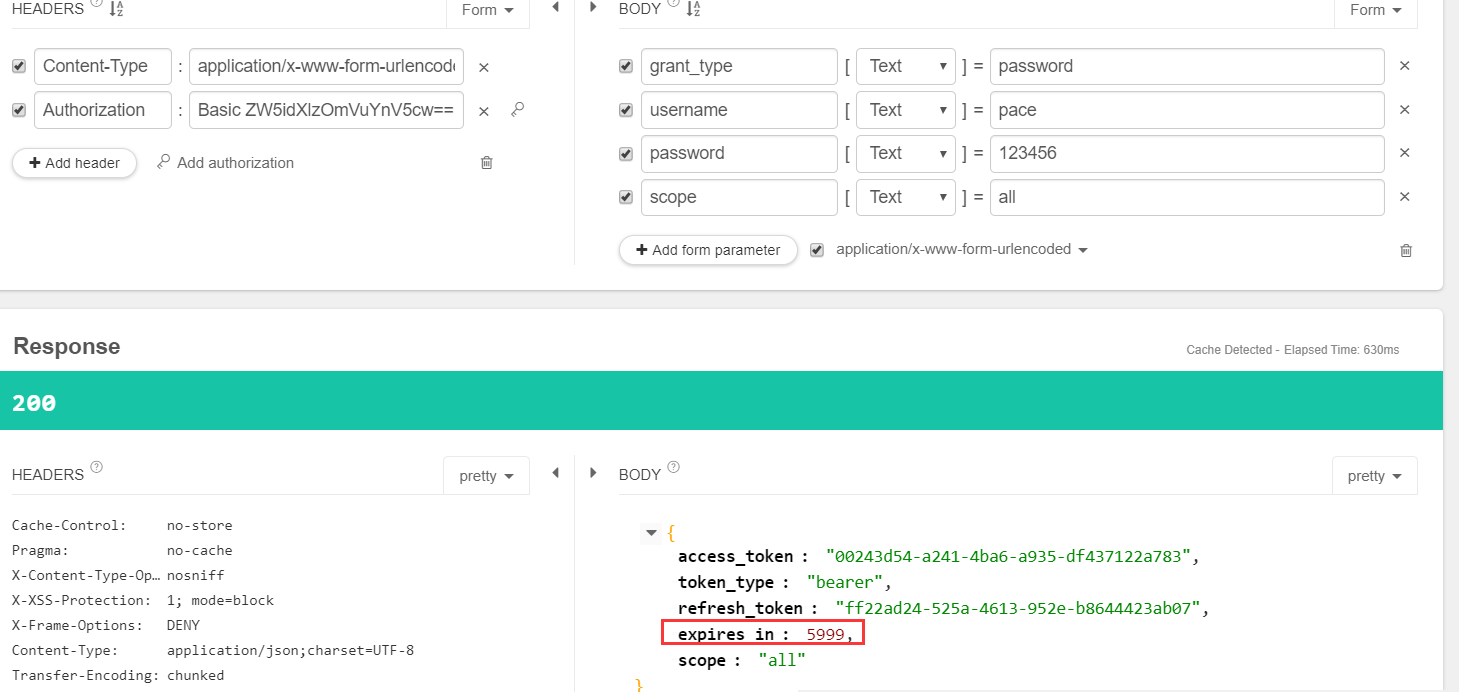
发送请求后,可以看到超时时间是我们设置的60秒
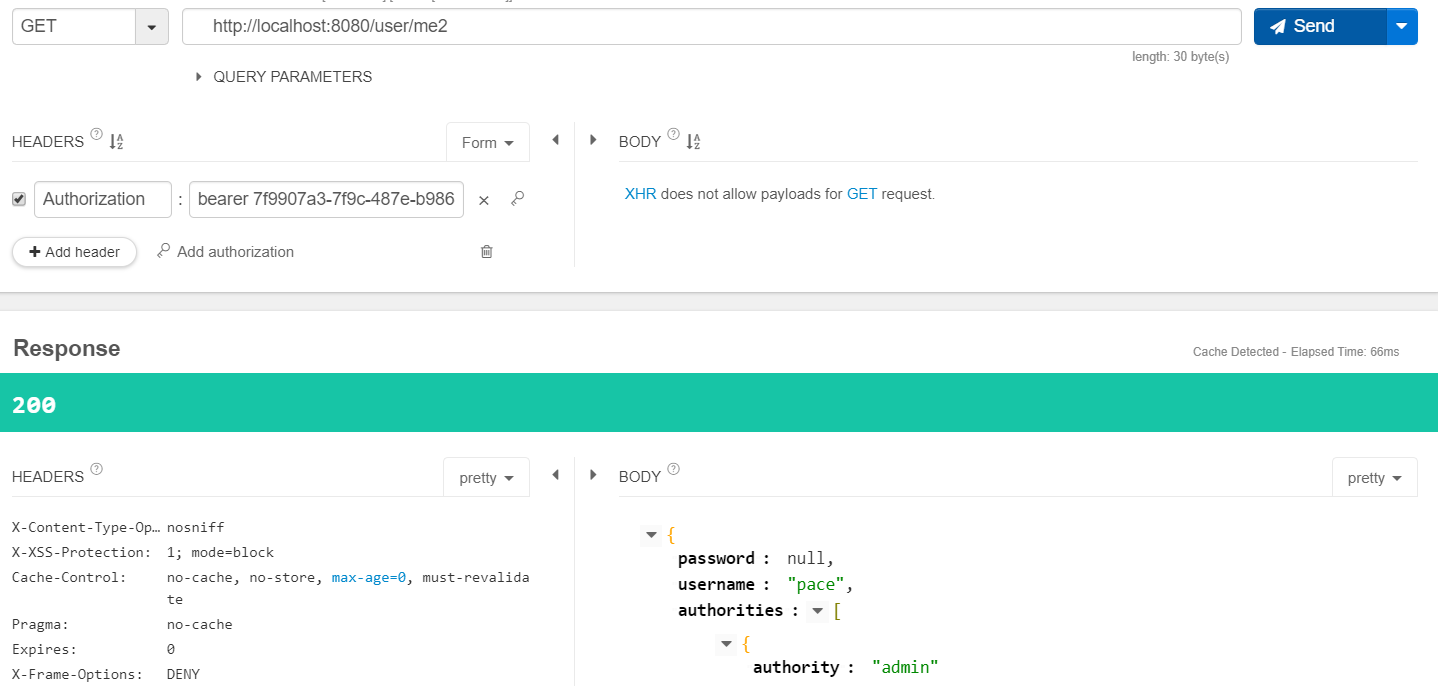
可以成功获取信息,并且Redis中保存了数据
使用JWT替换默认Token
JWT是什么
首先我们要先了解什么是JWT,Json Web Token,它是一种特殊的Token,有以下三个特点概况:
- 自包含:这个令牌中是包括一些信息的,而不是像普通的Token使用
UUID随机生成,拿到这个令牌,进行解析就可以获取到一些信息,比如用户信息请求信息等。这样的好处就是不用再服务端保存Token了,普通的Token保存在Redis或者Mysql中,如果数据库挂了,那么那些Token也就失效了,使用JWT就不会出现这种情况。也不用担心分布式集群时的Session共享问题。 - 可扩展:它除了默认的信息外,我们可以往里面添加自定义的信息,就比如
HTTP请求向请求头中添加自定义请求头一样。 - 密签:在生成JWT的时候,我们可以添加一个秘钥,他是一个签名,而不是加密,就是别人可以破解了解你这里面保存了什么东西,但是别人不能篡改。秘钥很重要,如果泄露别人就可以仿照我们的令牌进行不当操作。
实现JWT
在SpringSecurity OAuth中实现JWT很简单,我们之前看过源码,在生成Token的时候使用的是DefaultTokenServices生成,UUID的形式,我们想要生成JWT就需要向容器添加TokenEnhancer增强类,使默认生成的Token变成JWT:
- 配置
JwtAccessTokenConverter:本质是TokenEnhancer,作用是将默认生成的token做进一步处理使其成为一个JWT。 - 配置
TokenStore:和RedisTokenStore一样,JWT也有一个JWTTokenStore,因为我们其实并不需要保存JWT所以其实这个实现类就是什么都不做,不做持久化或者向添加到内存 - 将
TokenStore以及JwtAccessTokenConverter添加到认证服务器配置中
配置 JwtAccessTokenConverter 与 TokenStore
1 |
|
将TokenStore以及JwtAccessTokenConverter 添加到认证服务器配置中
1 |
|
然后启动测试
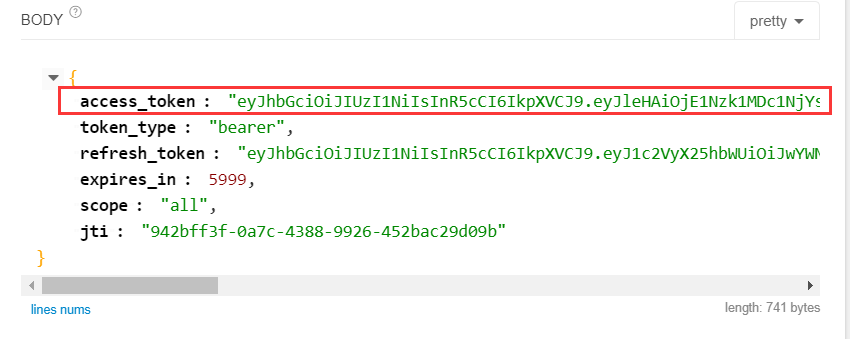
会发现Token变了,变的很长一串就是JWT了,而且每次请求不管是否超时都会重新生成新的JWT,如何查看这个Token中的内容呢?找一个解析网站解析:https://www.jsonwebtoken.io/
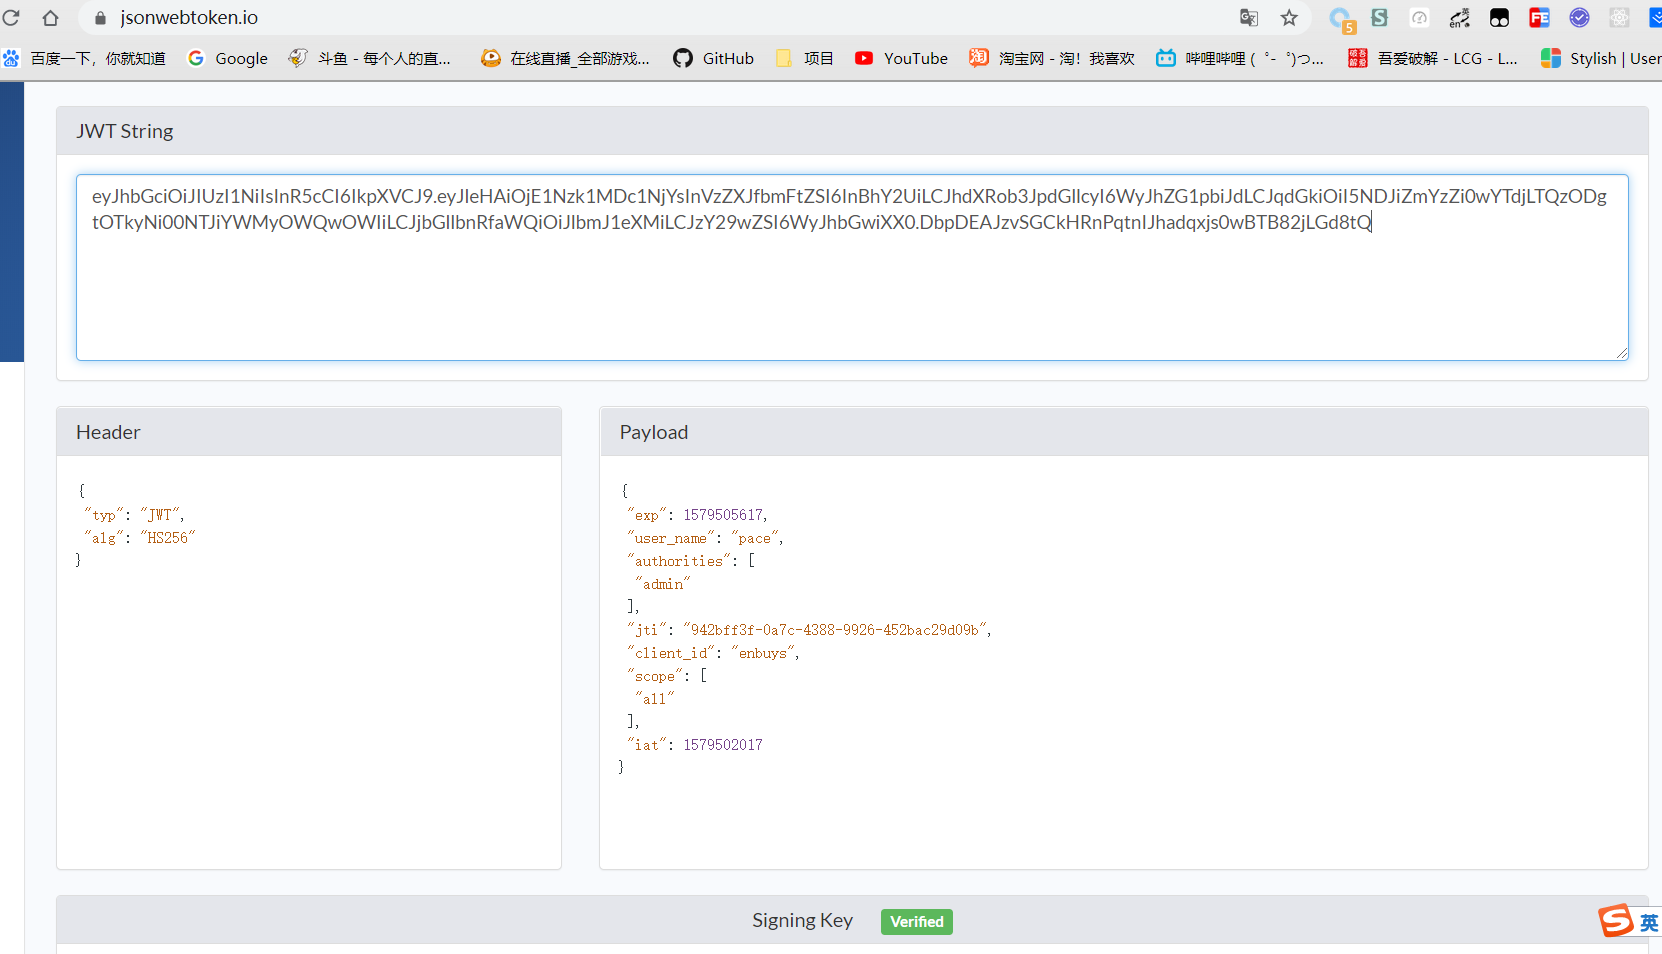
然后我们拿着Token获取用户信息
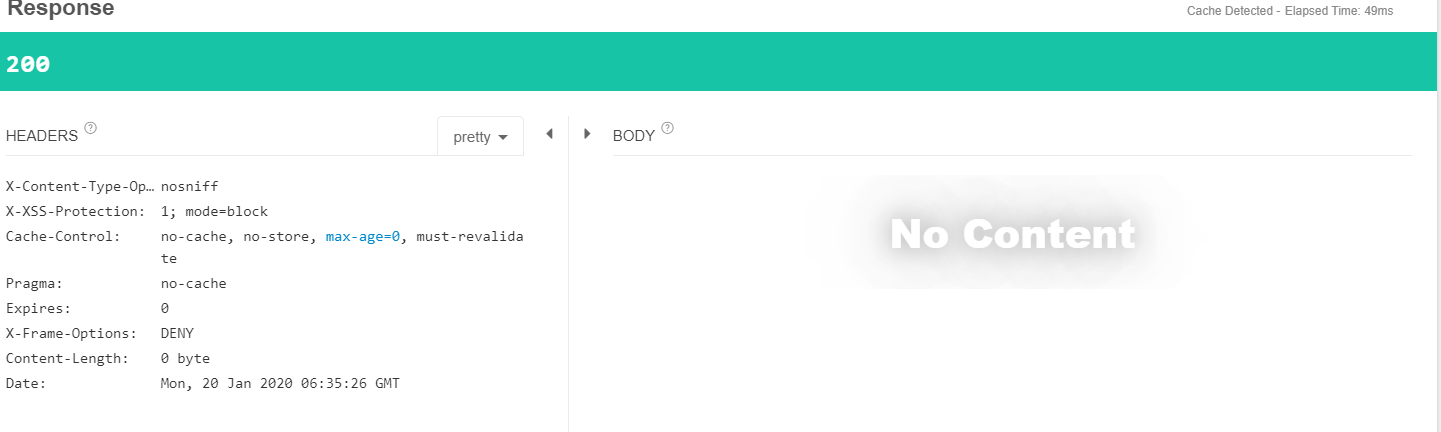
发现没有任何返回信息,为何?看看代码

这里我们使用的是Authorization中的Principal信息,可能因为信息不正确没有映射成功,我们请求/me看看

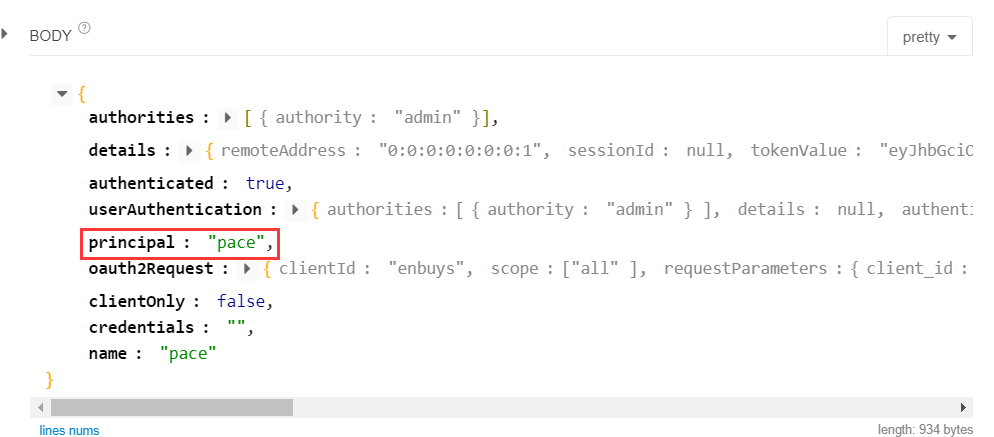
因为principal是一个字符串,所以没有返回。
这里JWT再传给资源服务器获取信息的时候,会将其解析并封装成SpringSecurity Authorization,而不是它本身包含的那些信息,这里需要根据业务需求去获取哪些信息,比如用户信息就保存在userAuthorization中
JWT扩展
向JWT中添加附加信息
就是类似像请求头中添加自定义信息一样,我们也可以往JWT中添加自定义信息,实现也非常简单
其原理就,自己写一个Token增强器,在Token生成后,对Token进行添加自定义信息。
实现自定义Token增强器
1 |
|
配置认证规则
1 |
|
这里我省略了之前的代码,对于需要添加多个增强器的,必须使用增强器链的形式,还有一点就是自定义的增强器要放在JWTConverter前面,不然不会生效!
启动测试
发送完,再看一下解析
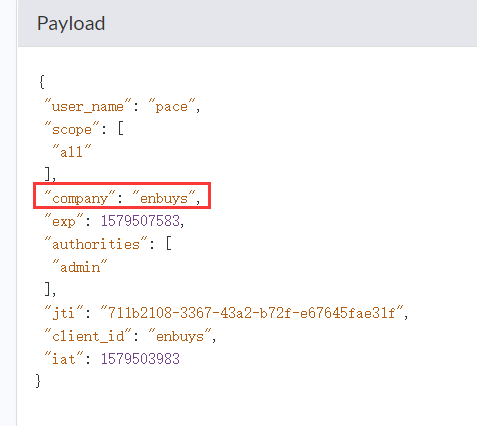
会发现多出来一个我们自定义的信息,然后我们请求/me接口,看看Authorization中的信息

这里会发现是没有我们添加的附加信息的,所以我们需要一些操作来获取附加信息
服务器获取JWT附加信息
我们需要借助jjwt这个插件实现获取,其实原理就是将JWT解析,然后存到Map里
加入依赖
1 | <dependency> |
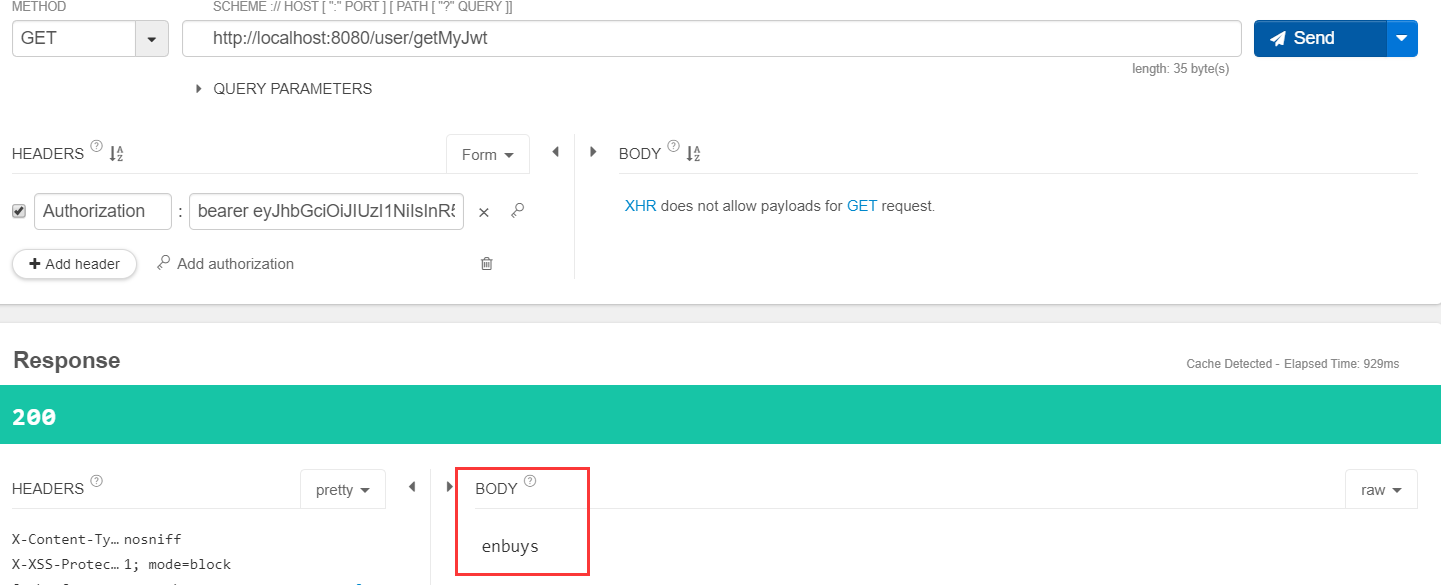
从请求头中获取到JWT,并利用Jwts工具借助密钥解析获得到扩展信息
1 | ("/getMyJwt") |
使用JWT实现SSO
SSO单点登录,就是在淘宝登录了,我们从淘宝点链接跳到天猫,会自动登录,不需要再次登录。
SpringSecurity OAuth实现方式
这里简单说一下,就不放代码了
- 首先需要创建一个认证服务器应用,用来做认证
- 然后创建两个客户端,用来当做淘宝和天猫
单点登录的配置很简单,启动器类添加一个注解,然后再配置文件中配置即可!
添加注解
1 |
|
@EnableOAuth2Sso 主要是这个注解开启OAuth2单点登录
配置文件配置
1 | # 单点登录配置 |
这只是最基本的配置,还有很多需要自己去实现,比如:
- 自定义的登录页面
- 自动授权