RabbitMQ整合-SpringBoot

快速入门

相同配置

这里我们把生产端和消费端分离,为两个不同的模块

但是具有相同的一些配置

Maven依赖

添加SpringBoot依赖

1
2
3
4
5
6
7
8
9
10
11
12
13
14
15
16
17
18
19
20
21
22
23
24
25
26
27
28
<parent>
<groupId>org.springframework.boot</groupId>
<artifactId>spring-boot-starter-parent</artifactId>
<version>1.5.14.RELEASE</version>
<relativePath/> <!-- lookup parent from repository -->
</parent>

<properties>
<project.build.sourceEncoding>UTF-8</project.build.sourceEncoding>
<project.reporting.outputEncoding>UTF-8</project.reporting.outputEncoding>
<java.version>1.8</java.version>
</properties>

<dependencies>
<dependency>
<groupId>org.springframework.boot</groupId>
<artifactId>spring-boot-starter</artifactId>
</dependency>
<dependency>
<groupId>org.springframework.boot</groupId>
<artifactId>spring-boot-starter-test</artifactId>
<scope>test</scope>
</dependency>
<dependency>
<groupId>org.springframework.boot</groupId>
<artifactId>spring-boot-starter-amqp</artifactId>
</dependency>
</dependencies>

配置文件

修改application.properties配置文件

1
2
3
4
5
# rabbitmq 连接配置
spring.rabbitmq.addresses=192.168.56.120:5672
spring.rabbitmq.username=guest
spring.rabbitmq.password=guest
spring.rabbitmq.virtual-host=/

这里使用配置的方式,也是和Spring一大不同,不用再去配置ConnectionFactory去获取连接了,因为SpringBoot有大量的自动配置类,自动进行初始化并添加到ApplicationContext中

生产端快速入门

想要快速的使用RabbitMQ在SpringBoot中非常简单

1.创建启动器类

1
2
3
4
5
6
@SpringBootApplication
public class Application {
public static void main(String[] args) {
SpringApplication.run(Application.class,args);
}
}

2.创建一个测试类发送消息

1
2
3
4
5
6
7
8
9
10
11
12
13
14
15
16
@RunWith(SpringRunner.class)
@SpringBootTest
public class ApplicationTest {

@Autowired
private RabbitTemplate rabbitTemplate;

@Test
public void sendMsg(){
MessageProperties properties = new MessageProperties();
String str = new String("msg");
Message msg = new Message(str.getBytes(),properties);

rabbitTemplate.send("springboot.exchange","springboot.test",msg);
}
}

注:这里的exchange需要自己去创建一个,我这个是直接在控制台创建的
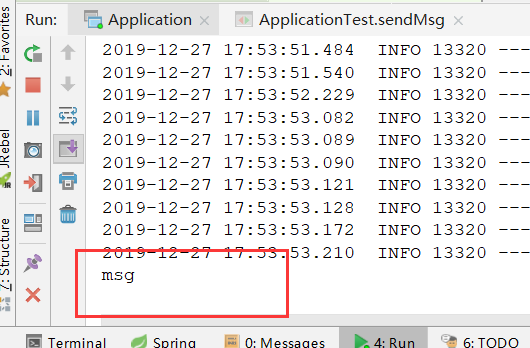
3.运行测试类

1577439608213

运行后,可以看到队列中有一条消息等待消费了

消费端快速入门

消费端的使用就更简单了,主要就是@RabbitListener这个注解

1.创建启动器类和配置(同生产端)

2.创建一个Consumer类

1
2
3
4
5
6
7
8
@Component
public class Consumer {

@RabbitListener(queues = "springboot.queue")
public void onMessage(Message message){
System.out.println(new String(message.getBody()));
}
}

分为两步走:

  • 添加@Component注解,将消费者注入到容器中
  • 在方法上添加@RabbitListener注解,指定队列名,便可以持续监听消费

3.启动Application测试

1577440573875

正确消费

对于SpringBoot使用RabbitMQ就是这么简单,接下来说一些其他重要使用方式

生产端高级使用

消息的confirm和return机制

使用springboot时,在application.properties中进行一些配置,可以简单方便的开启一些高级特性,比如:

1
2
3
4
5
6
# 开启confirm机制
spring.rabbitmq.publisher-confirms=true
# 开启return模式
spring.rabbitmq.publisher-returns=true
# 配合return机制使用,表示接收路由不可达的消息
spring.rabbitmq.template.mandatory=true
  • publisher-confirms:开启Confirm,对应需要创建Confirm监听器,进行confirm处理,使用 RabbitTemplate.ConfirmCallback,然后为RabbitTemplate进行设置setConfirmCallback()
  • publisher-returns:开启Return机制,对应需要创建Confirm监听器,进行confirm处理,使用 RabbitTemplate.ReturnCallback,然后为RabbitTemplate进行设置setReturnCallback()

代码演示

1
2
3
4
5
6
7
8
9
10
11
12
13
14
15
16
17
18
19
20
21
22
23
24
25
26
27
28
29
30
31
32
33
34
35
36
37
38
39
40
41
42
43
44
45
46
47
48
49
50
@RunWith(SpringRunner.class)
@SpringBootTest
public class SendTest {

@Autowired
private RabbitTemplate rabbitTemplate;

final RabbitTemplate.ConfirmCallback confirmCallback = new RabbitTemplate.ConfirmCallback() {
@Override
public void confirm(CorrelationData correlationData, boolean ack, String cause) {
System.out.println("------------- confirm Callback --------------");
System.out.println("correlationData:" + correlationData);
System.out.println("ack:" + ack);
System.out.println("cause:" + cause);
if(!ack){
System.err.println("ack false,进行补偿机制");
}
}
};

final RabbitTemplate.ReturnCallback returnCallback = new RabbitTemplate.ReturnCallback() {
@Override
public void returnedMessage(Message message, int replyCode, String replyText, String exchange, String routingKey) {
System.out.println("------------- return Callback --------------");
System.out.println("return exchange: " + exchange + ", routingKey: "
+ routingKey + ", replyCode: " + replyCode + ", replyText: " + replyText);
}
};

@Test
public void sendMsg(){
MessageProperties properties = new MessageProperties();
String str = new String("RabbitMQ SpringBoot Quick Start");
Message msg = new Message(str.getBytes(),properties);
// 为RabbitTemplate添加Confirm Return
rabbitTemplate.setConfirmCallback(confirmCallback);
rabbitTemplate.setReturnCallback(returnCallback);

//需保证全局唯一 ,这个是实际消息的ID
//在做补偿性机制的时候通过ID来获取到这条消息进行重发
String id = UUID.randomUUID().toString();
CorrelationData correlationData = new CorrelationData(id);

//rabbitTemplate.send("springboot.exchange","springboot.test",msg,correlationData);
// 不存在的exchange,测试confirm中 ack为false的情况
//rabbitTemplate.send("rbtError","1",msg,correlationData);
// 不存在的routingKey,测试return机制
rabbitTemplate.send("springboot.exchange","1",msg,correlationData);
}
}

代码非常简单,首先创建两个Callback类,进行方法实现,然后再发消息时进行设置,这里我发送三次消息

第一次,正确的消息投递

1
rabbitTemplate.send("springboot.exchange","springboot.test",msg,correlationData);

控制台打印:

1577537627880

第二次,不存在的exchange,错误投递,走confirm,但是ack为false

1
rabbitTemplate.send("springboot.exchange","1",msg,correlationData);

控制台打印:

1577537595324

第三次,不存在的routingkey,即路由不可达,走return机制

1
rabbitTemplate.send("springboot.exchange","1",msg,correlationData);

控制台打印:

1577537473224

消费端高级使用

对于消费端来说,最重要的就是两个注解

  • @RabbitListener :使用这个注解标记方法,用来监听配置的队列,也可以声明绑定关系在RabbitMQ中创建
  • @RabbitHandler:表示这个方法是一个RabbitMQ的消费方法,一般配合@RabbitListener使用

@RabbitListener 使用方式

使用方式主要有两种

  • 一种是直接配置监听的队列,如果有消息就进行消费
  • 第二种是可以声明绑定关系,这样如果MQ中没有这些ExchangeQueue会自动创建,有的话就不创建

第一种使用方式

就是我们快速入门中的使用方式:

1
2
3
4
@RabbitListener(queues = {"springboot.queue","springboot.queue2"})
public void onMessage(Message message){
System.out.println(new String(message.getBody()));
}

这里可以声明多个

第二种使用方式

1
2
3
4
5
6
7
8
@RabbitListener(bindings = @QueueBinding(
value = @Queue(value = "springboot.queue",durable = "true"),
exchange = @Exchange(value = "springboot.exchange",type = "topic"),
key = "springboot.#"
))
public void onMessage(Message message){
System.out.println(new String(message.getBody()));
}

如上代码,可以配置Binding(多个),如果没有这样的绑定关系,会根据是否存在QueueExchange进行创建

@RabbitHandler 使用方式

这个注解一般配置@RabbitListener使用,并且@RabbitListener绑定在类上时

  • @RabbitListener 可以标注在类上面,需配合 @RabbitHandler 注解一起使用
  • @RabbitListener 标注在类上面表示当有收到消息的时候,就交给 @RabbitHandler 的方法处理,具体使用哪个方法处理,根据 MessageConverter转换后的参数类型
1
2
3
4
5
6
7
8
9
10
11
12
13
14
15
@Component
@RabbitListener(queues = "springboot.exchange")
public class Receiver {

@RabbitHandler
public void processMessage1(String message) {
System.out.println(message);
}

@RabbitHandler
public void processMessage2(byte[] message) {
System.out.println(new String(message));
}

}

@Payload与@Headers

这也是RabbitMQ对于SpringBoot来说,常用的一种注解方式,主要用作方法的入参上,类似@RequestParam

  • @Payload:绑定入参,表示此参数为消息的body
  • @Headers:绑定入参,表示此参数为消息的Properties
1
2
3
4
5
@RabbitListener(queues = {"springboot.queue","springboot.queue2"})
public void onMessage(@Payload byte[] body, @Headers Map<String,Object> headers){
System.out.println("使用@Payload接收的body:" + new String(body));
System.out.println("使用@Headers接收的headers:" + headers);
}

1577535737626

打印出消息体以及消息的Properties信息

也可以使用@Header, 获取单个 Header属性

1
2
3
4
5
@RabbitListener(queues = "debug")
public void processMessage1(@Payload String body, @Header String contentType) {
System.out.println("body:"+ body);
System.out.println("contentType:"+ contentType);
}

高级配置

使用springboot时,在application.properties中进行一些配置,可以简单方便的开启一些高级特性,比如:

1
2
3
4
5
6
# 设置签收模式:AUTO(自动签收)、MANUAL(手工签收)、NONE(不签收,没有任何操作)
spring.rabbitmq.listener.simple.acknowledge-mode=MANUAL
# 设置当前消费者数量(线程数)
spring.rabbitmq.listener.simple.concurrency=1
# 设置消费者最大并发数量
spring.rabbitmq.listener.simple.max-concurrency=5

在设置手工签收后,对于消息的消费需要进行ACK返回

1
2
3
4
5
6
 @RabbitListener(queues = "springboot.queue")
public void onMessage(Message message, Channel channel) throws IOException {
System.out.println(new String(message.getBody()));
long deliveryTag = message.getMessageProperties().getDeliveryTag();
channel.basicAck(deliveryTag,false);
}