一、分布式Config
1.分布式配置架构
传统架构
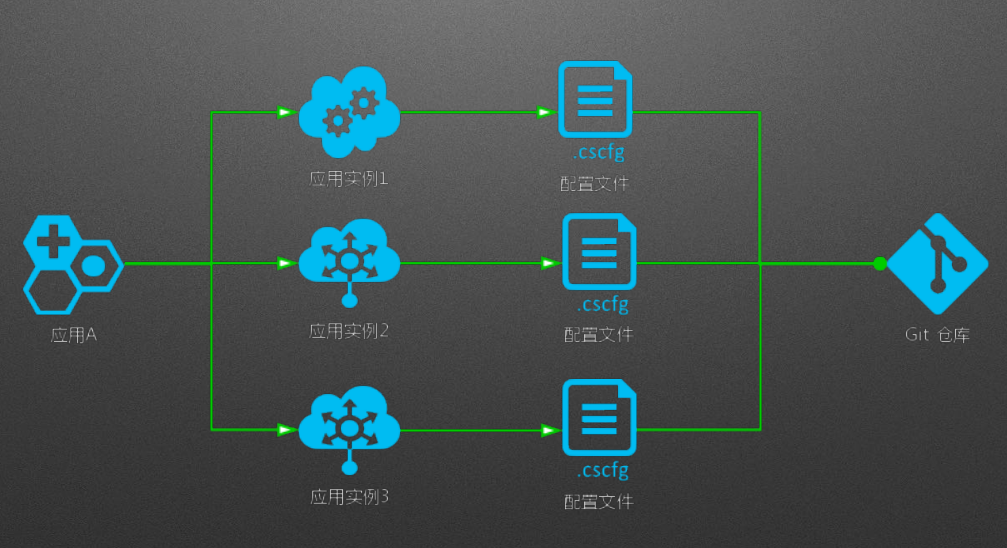
可以看到,在传统架构中,每个配置硬编码到应用中,写在properties或者xml里,跟随这项目一起保存到git或者svn仓库中。当配置越来越多的时候,比如MQ,数据库,Redis,ES等等的配置,只能一个文件一个文件的累加,并且每当修改时都需要重新打包部署,浪费时间且冗余。
缺点:
- 硬编码
- 写在properties,集群环境下需要替换和重启
- 写在xml中,和应用一起打包,替换需要重新打包部署
SpringCloud Config

由于常用的项目+配置的方式有很大缺点,SpringCloud提供了一个配置中心来统一管理配置,它分为服务端和客户端。解决了配置中心化,版本控制,硬编码等问题
服务端即分布式配置中心,为一个单独的微服务应用,用于连接客户端与仓库,为客户端提供相应的配置信息等。服务器默认采用git来存储配置信息,这样有助于对环境配置进行版本管理,并且可以通过git客户端工具来方便的管理和访问配置内容。
客户端是指通过指定的配置中心来管理应用资源,以及与业务相关的配置内容,并在启动的时候从配置中心获取和加载配置信息。
2.EnvironmentRepository仓储
这里我们先介绍一下SpringCloudConfig的仓储,对于配置服务器管理多个配置,客户端获取时需要一定的规则来获取,SpringCloudConfigServer提供了EnvironmentRepository接口供客户端获取,其具体规则为:
- {application}:配置客户端应用名称
- {profile}:客户端使用的配置文件环境,比如开发环境或线上环境
- {label}:版本信息,比如git的分支master or dev
服务端配置映射主要有五种:
- /{application}/{profile}[/{label}]
- /{application}-{profile}.yml
- /{label}/{application}-{profile}.yml
- /{application}-{profile}.properties
- /{label}/{application}-{profile}.properties
3.搭建Spring Cloud Conifg Server
关于SpringCloud Config Server的搭建非常简单,最主要是用到@EnableConfigServer这个注解
首先需要基于SpringBoot创建一个SpringCloud应用,pom文件额外需要添加:
1 | <dependency> |
基于本地Git仓库
1.需要在启动器类上加入@EnableConfigServer注解
2.在application.properties中添加配置信息,如下:主要是配置本地git路径
1 | ## 配置服务器应用名称 |
Tips:${user.dir}为此项目在电脑上的绝对路径,比如windows系统下(D:\ideaProject\SpringCloud...),如果在linux系统下即(home/…),使用这个做路径可以很好的适配各个平台的文件路径
3.对应本地git路径创建文件夹及文件
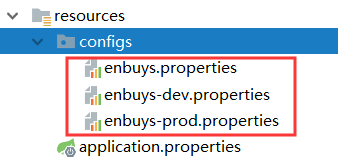
这里我们创建三个配置文件
- enbuys:默认的配置
name=enbuys
- enbuys-dev:开发环境时的配置
name=enbuys-dev
- enbuys-prod:线上生产环境配置
name=enbuys-prod
4.在configs目录下进行git初始化
1 | > git init |
5.启动测试
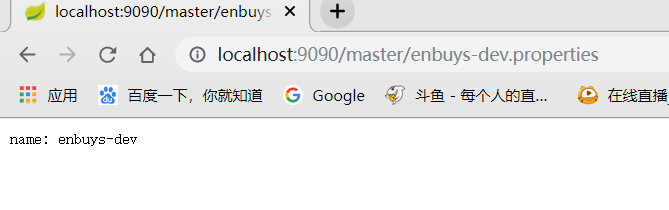
访问http://localhost:9090/enbuys/test
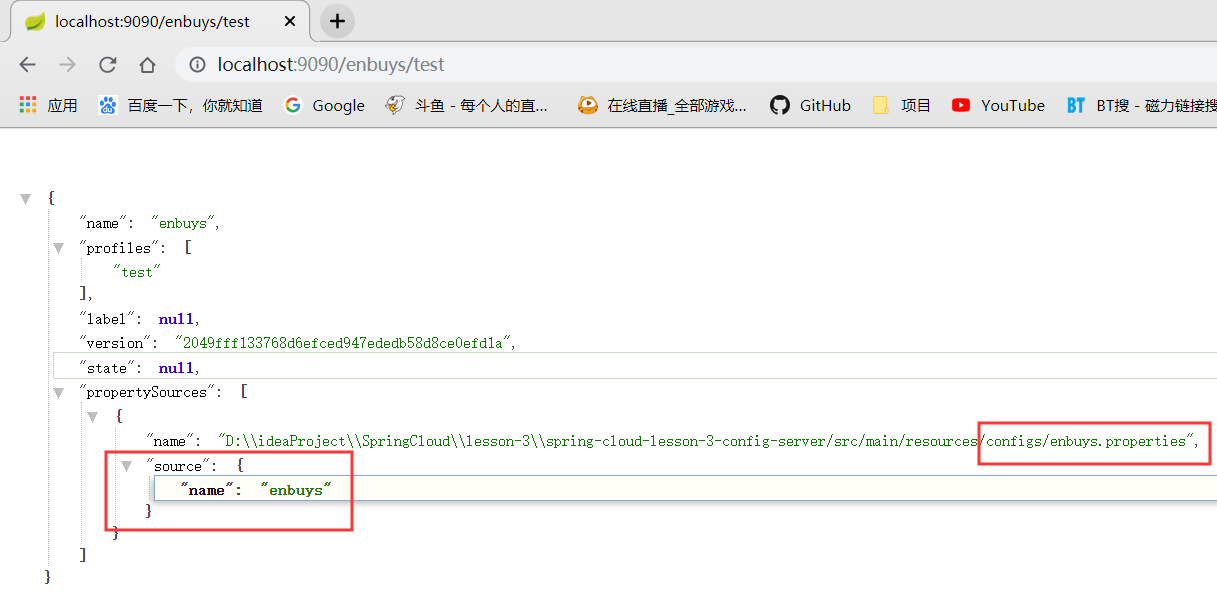
因为我想访问dev的,打错了,所以可以发现,如果输入一个没有的配置文件,其会自动使用默认的配置文件
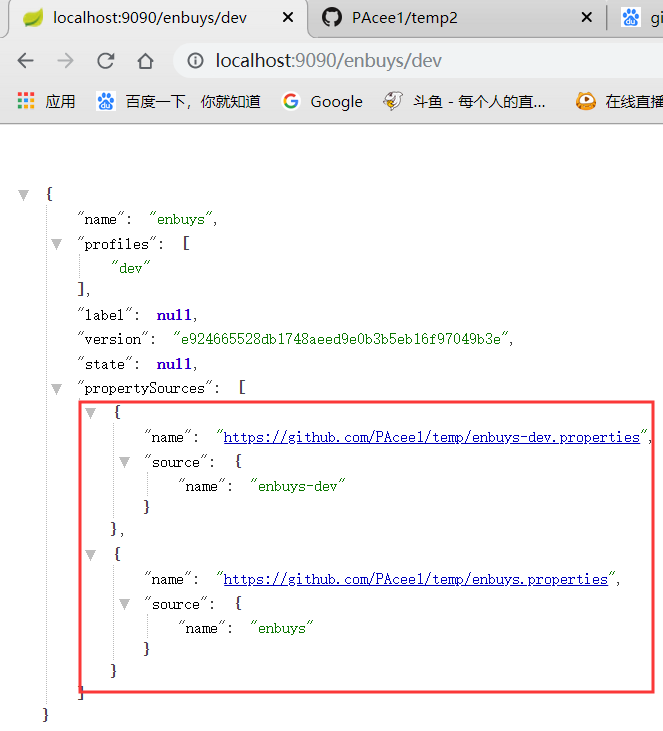
再访问下http://localhost:9090/enbuys/dev
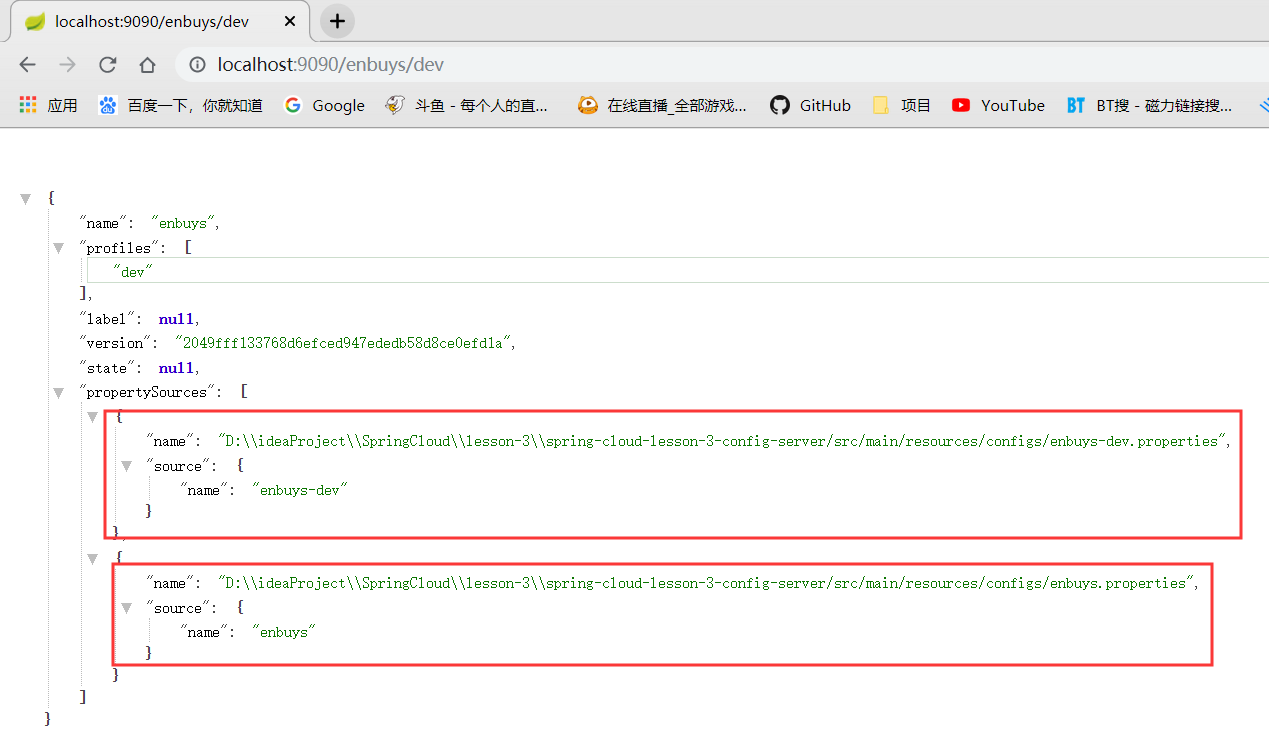
可以发现会把enbuys-dev与默认配置文件都输出出来
我们这里使用的映射即为
/{label}/{application}-{profile}.properties
基于远程Git仓库
即把我们的配置放到github上面,方法也很简单,和本地仓库类似
1.添加注解@EnableConfigServer
2.在github上创建一个Repository
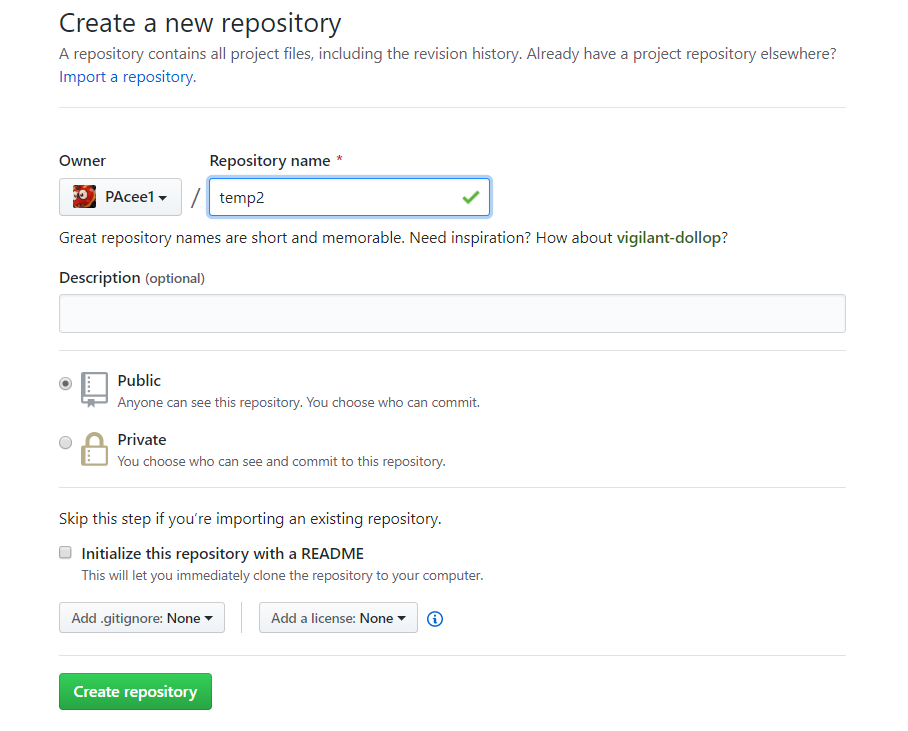
3.根据github提示,找个文件夹绑定远程仓库
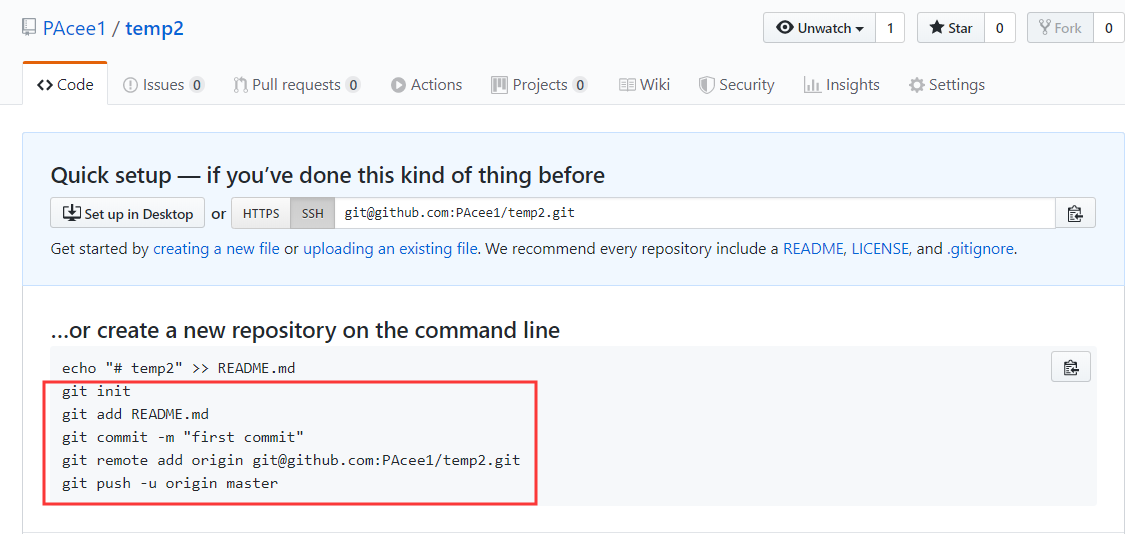
4.将三个配置文件放到init的那个文件夹,上传到远程git仓库
1 | > git add . |
5.修改项目中的git.url路径
1 | # 远程git仓库 |
6.测试
可以看到正确输出远程仓库上的信息
Tips:
spring.cloud.config.server.git.force-pull,因为git拉取时有时会走本地缓存,如果配置这个可以保证强制拉取远程仓库上的配置
不同方式访问
还记得我们在上面介绍EnvironmentRepository仓储时,对资源的映射方式有好几种,我们来测试一下:
/{application}/{profile}[/{label}]:
这种就是我们上面使用的,对于请求比较模糊时使用,会输出很多信息
/{application}-{profile}.properties:
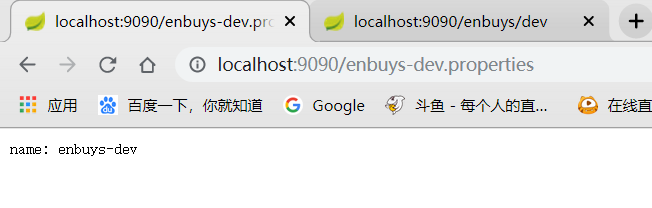
使用这种方式,可以具体的显示出配置文件中的信息
/{label}/{application}-{profile}.properties
也是一样输出详细信息
4.搭建Spring Cloud Config Client
客户端加入的pom依赖和server不同,为:
1 | <dependency> |
搭建客户端获取服务器中的配置也非常简单
1.配置application.properties
1 | ## 配置客户端应用名称 |
还是基本的一些配置信息
2.配置bootstrap.properties
1 | ## 配置客户端应用关联的应用 |
Tips:这里的cloud的config配置也可以写在
application.properties,这里写在bootstrap的配置文件中主要还是一个规范问题,因为SpringCloud使用Bootstrap做上下文,对于关于SpringCloud的配置也应该写在bootstrap.properties里
3.启动测试

首先可以在控制台看到SpringCloud加载时去请求服务器获取配置信息
然后在在浏览器上查看
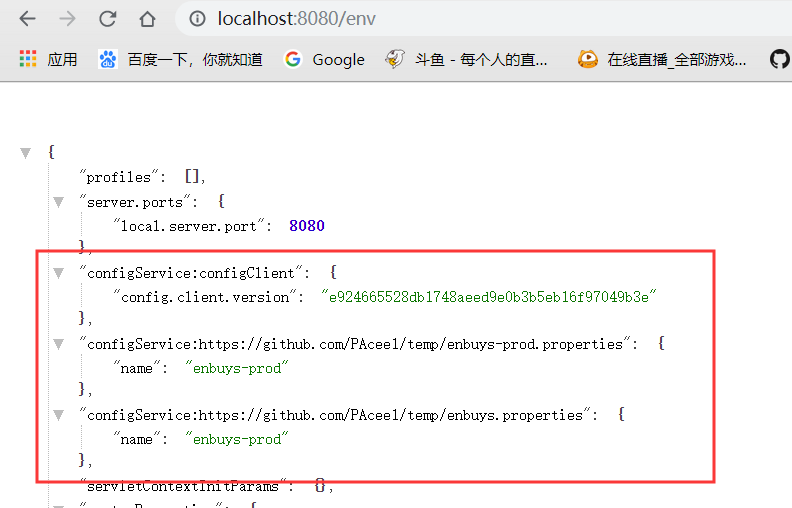
可以看到也正确加载到Environment中了
5.动态配置Bean
动态配置Bean在之前学springBoot的时候已经做过,无非是在Bean上加一个@ConfigurationProperties注解
这里我们要说的是,从SpringCloud Config Server拉取Bean的信息进行注入,
客户端配置文件注入
Bean:
1 | (prefix = "enbuy.user") |
application.properties:
1 | #配置user信息 |
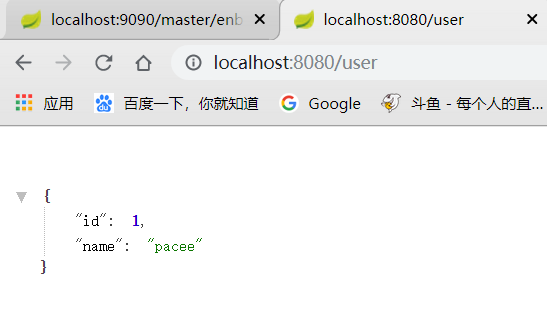
UserController:
1 |
|
正确显示出来
服务器配置文件注入
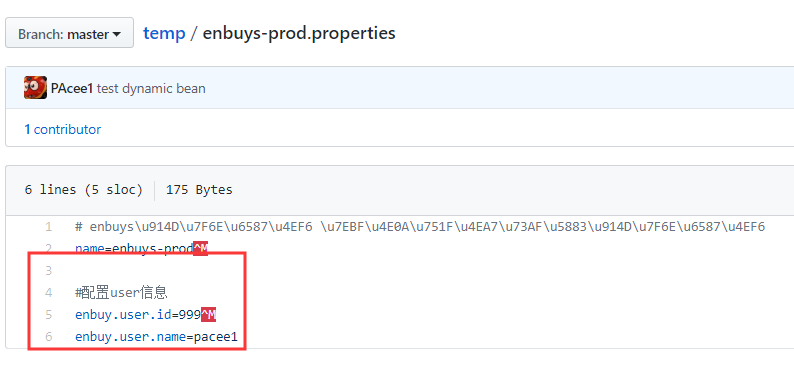
其次,我们将配置放到github上的配置文件上,然后再进行拉取远程配置注入
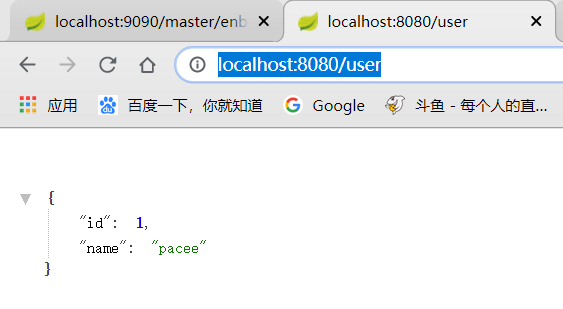
再次访问http://localhost:8080/user
可以发现还是原来的信息,这是为什么呢?
因为这里使用的还是原来的远程配置,没有动态的刷新配置,这里我们先对客户端环境进行refresh
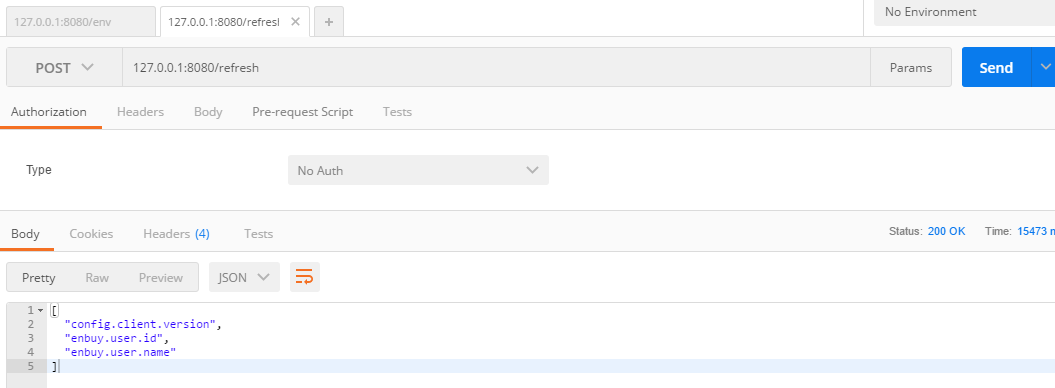
可以看到,刷新了三个信息,版本以及我们修改的Bean信息。
再次请求
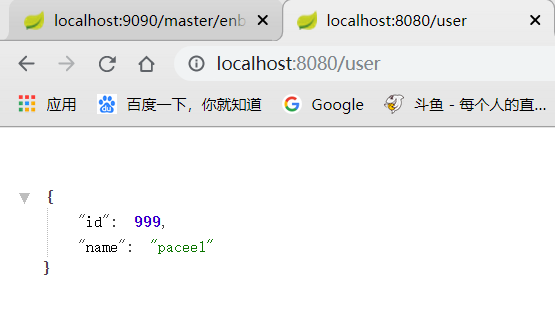
可以发现正确修改成远程配置服务器上的信息了。这里有两个问题需要注意的:!
==1.拉取远程服务器上的配置,比客户端中application或bootstrap的配置优先级高==
==2.SpringCloud当配置服务器修改时,不会自动刷新客户端拉取新的配置==
自动拉取服务器配置
这里我们就应该对第二个问题展开探究,这里实现的方式有很多种
- SpringCloud提供的
SpringCloud Bus - 使用定时器配合
ContextRefresh进行刷新
这里我们先使用ContextRefresh,因为这种方式适配各种情景,比如我们不使用http请求即Git当配置服务器,而是zookeeper实现配置服务器,这种方式就可以完全适应,不用修改任何东西。
Java代码实现:
1 |
|
可以看到,这里我们使用1秒刷新一次的策略,代码也是比较简单。

可以看到,正确刷新了我们服务器上修改的配置
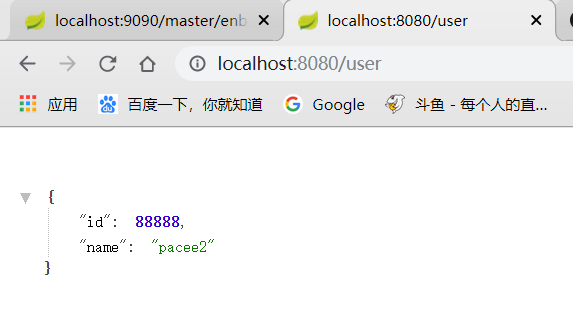
请求user,输出信息也是我们期望的。
这样我们就简单实现了自动拉取配置服务器上修改的内容了
二、Health EndPoint
之前介绍过几个传动器端点,前面一直在使用env这个端点,现在说下health端点。
这个端点可以查看服务的健康程度,就包含我们刚刚配置的Config Server
因为我们上面已经配了全局的端点敏感性为false,所以可以直接查看
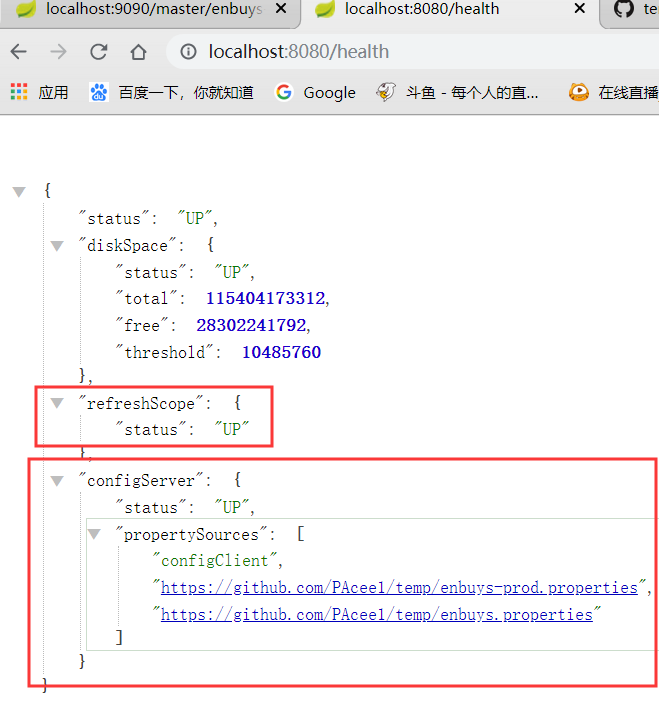
可以看到默认包含四个PropertySource
- status:总体健康程度
- diskSpace:磁盘健康
- refreshScope:刷新的健康
- configServer:配置服务器的健康程度
自定义健康组件
我们先观察下Health的源码:
1 | (prefix = "endpoints.health") |
可以发现,在构造函数中,HealthEndpoint循环HealthIndicator加入到容器中,看到这个就想起在SpringBoot学习时,那些自动配置类也是这样循环加入容器的,我们便可以仿照SpringBoot添加组件的方式,创建一个类实现HealthIndicator,然后添加到容器中。
1.创建一个类实现`HealthIndicator`
1 | public class HealthCustomer implements HealthIndicator { |
可以看到这里需要返回一个Health对象,再进到Health里查看
1 | public final class Health { |
可以看到Health是由Builder创建的,那意思是我们也需要创建一个Builder来初始化Health,再看下Builder
1 | public static class Builder { |
Builder的创建就很简单了,传递status状态已经具体的detailsMap信息即可
2.在我们的类中创建Builder并初始化Health返回
1 |
|
这样就创建完毕我们自定义的Health组件了,记得要加上@Component注解
3.浏览器查看
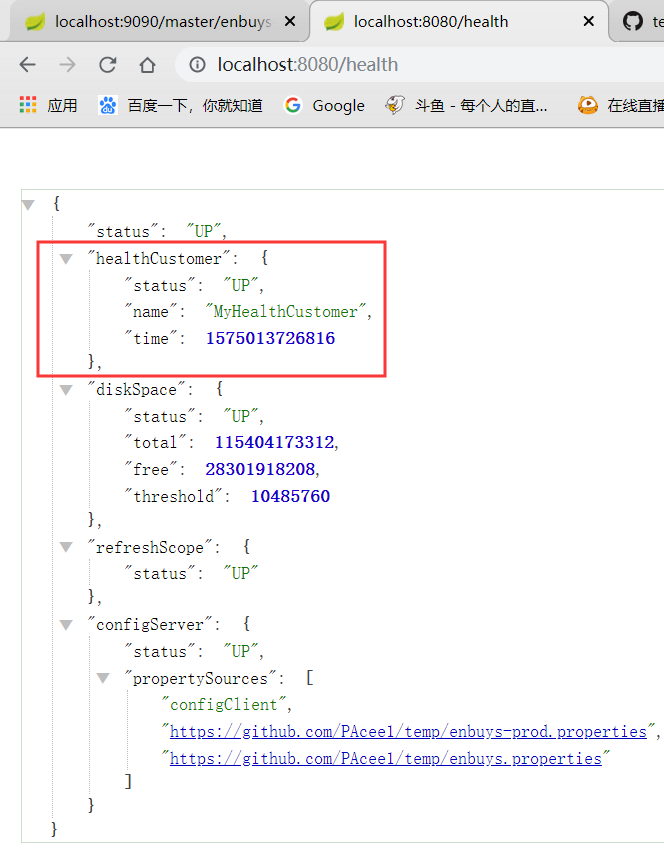
正确加载进HealthEndpoint中